Still warming up to working in Unity, I’m slowly learning how to apply what I know about programming generally to a new language and framework. For example: Singletons, a single instance object that tends to work best as a utility.
When looking around for how to to implement audio programmatically I found the part of a tutorial I worked through years ago, the officially provided 2D RogueLike Tutorial. Specifically its Audio and Sound Manager, which happens to be a Singleton.
I’m sure this example is most useful for a 2D game, where you expect the sound or music to play without any sense of depth or location, but what re-discovering the tutorial reminded me is that it I can make use of familiar patterns in almost any language. Patterns are awesome!
SoundManager Component
Here is my version of the component:
There is a bit going on here, so let’s break it down:
- It inherits MonoBehavior, so it can be assigned as a Component to any GameObject.
- It expects two
AudioSourcecomponents be assigned to it. You can do this through the UI. We’re going to use one AudioSource as the game music, and the other to play the sound effects. - It has a few methods.
Play()simply plays whatever AudioClip is passed in through the sound effects AudioSource.PlayMusic()plays whatever AudioClip is passed in through the music AudioSource.RandomizeSoundEffects()plays one random item from an array of AudioClips, and randomizes the pitch of the clip slightly to provide some additional variation
- It is a Singleton, ensuring that only one instance of itself ever exists. It maintains the singleton pattern by having a static property where it stores itself. Setting this property to
statictells the system to always look in the same memory location for its value. When the componentAwake()s, it checks the value of the static instance and sets or destroys the value as appropriate. - It persists between scenes by running the
DontDestroyOnLoad()method on its GameObject.
In the game editor/UI, you would use this compent like so:
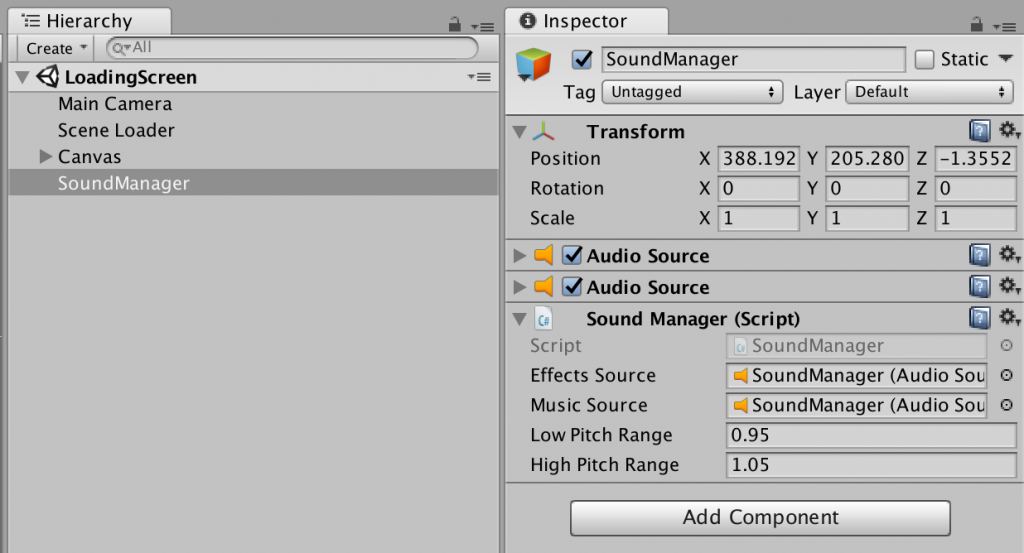
To create this setup, follow these steps:
- Create an empty Game Object and name it “SoundManager”, or whatever you want to name it.
- Add two Audio Source components to the game object.
- Add our new Sounce Manager component to the game object.
- Click and drag the first Audio Source component, then drop it in the “Effects Souce” property of the Sound Manager component.
- Click and drag the second Audio Source component, then drop it in the “Music Source” property of the Sound Manager component.
Now you’re ready to use it!
Scripting with SoundManager Singleton
Since this object never destroyed between scenes and enforces only a single instance of itself ever exists we can use this object directly from anywhere in the rest of our game code. We just need to access the SoundManager.Instance object directly.
Here is how you might use it from another script to start playing whatever AudioClip is assigned to “BattleMusic”.
Pretty straight foward!
And here is an example of how you might use it to play random sound effects:
Conclusion
Finding that tutorial was great for a number of reasons, but my main takeaway was remembering that I know patterns (anti or otherwise) that are generally applicable to various languages and projects. Next time I need to solve a seemingly complex problem in Unity, I’ll think about what I already know and how it might be applied before searching. Seems like I have to re-learn this lesson in every new language… ¯\_(ツ)_/¯
Discussion
Nice start but you should not use singletons like this. Please take a look at the toolbox pattern.
Try out this audio manager. I found it usefull in most cases.
https://www.technoob.me/2019/01/how-to-make-advanced-audio-manager-unity.html?m=1
Great code. Thank you very much.
Great! Thanks a lot